Category: Swift

  • iOS — Play RTSP Streaming

    iOS — Play RTSP Streaming

    Hướng dẫn build IJK Player để play RTSP streaming

    Table of Contents

    Chuẩn bị môi trường

    • Cài đặt Homebrew ruby -e "$(curl -fsSL https://raw.githubusercontent.com/Homebrew/install/master/install)"
    • Cài git brew install git
    • Cài yasm brew install yasm
    • Clone IJKPlayer từ github:
      • git clone https://github.com/RioV/ijkplayer.git ijkplayer-ios
        • Note: ở đây dùng /RioV/ijkplayer bởi vì đang tìm hiểu thấy IJKPlayer có issue, vậy nên folk sang một bản khác để tiện fix bug
        • Note: chú ý checkout source code về folder mà tên không có space, ví dụ: IJK Player => NG, IJK-Player => OK. Việc này sẽ ảnh hưởng đến tiến trình build lib, nếu như có space thì build sẽ bị lỗi.
      • cd ijkplayer-ios
      • git checkout -B latest k0.8.8 version lấy theo release tag của IJKPlayer Release Nếu sau này sửa lỗi lib ở branch develop thì sẽ là git checkout -B develop

    Build lib IJKPlayer

    • cd config
    • rm module.sh
    • ln -s module-lite.sh module.sh -> việc này sẽ bỏ module.sh default và thay vào đó sử dụng moule-lite.sh nhằm giảm binary size
    • Để build lib support RTSP thì cần chỉnh sửa file module-lite.sh như sau:
      • Xoá: export COMMON_FF_CFG_FLAGS="$COMMON_FF_CFG_FLAGS --disable-protocol=rtp"
      • Add: export COMMON_FF_CFG_FLAGS="$COMMON_FF_CFG_FLAGS --enable-protocol=rtp"
      • Add: export COMMON_FF_CFG_FLAGS="$COMMON_FF_CFG_FLAGS --enable-demuxer=rtsp" (nên để trong section của demuxer)
    • cd ..
    • ./init-ios.sh
    • cd ios
    • ./compile-ffmpeg.sh clean
    • Sửa file ijkplayer-ios/ios/compile-ffmpeg.sh
      • Chuyển:

        FF_ALL_ARCHS_IOS6_SDK="armv7 armv7s i386" FF_ALL_ARCHS_IOS7_SDK="armv7 armv7s arm64 i386 x86_64" FF_ALL_ARCHS_IOS8_SDK="armv7 arm64 i386 x86_64"

        Thành

        FF_ALL_ARCHS_IOS8_SDK="arm64 i386 x86_64"

    • ./compile-ffmpeg.sh all
      • Note: Với câu lệnh ./compile-ffmpeg.sh all thì rất dễ xảy ra lỗi nếu như source code đang ở trong directoy có chứa space. Ví dụ: working directory là /Documents/JLK Player thì sẽ lỗi, để fix thì chuyển thành /Documents/IJKPlayer

    Tích hợp IJKPlayer vào project

    • Add IJKPlayer vào project: File -> add File to "Project" -> chọn ijkplayer-ios/ios/IJKMediaPlayer/IJKMediaPlayer.xcodeproj
    • Chọn: Application’s target.
      • Vào: Build Phases -> Target Dependencies -> Chọn IJKMediaFramework
      • Chọn IJKMediaPlayer.xcodeproj, chọn target IJKMediaFramework và build.
      • Vào: Build Phases -> Link Binary with Libraries -> Thêm:
        • libc++.tbd
        • libz.tbd
        • libbz2.tbd
        • AudioToolbox.framework
        • UIKit.framework
        • CoreGraphics.framework
        • AVFoundation.framework
        • CoreMedia.framework
        • CoreVideo.framework
        • MediaPlayer.framework
        • MobileCoreServices.framework
        • OpenGLES.framework
        • QuartzCore.framework
        • VideoToolbox.framework

    Sample

    Sử dụng đoạn source code sau để play thử RTSP stream bằng IJKPlayer

    import UIKit
    import IJKMediaFramework
    
    class IJKPlayerViewController: UIViewController {
        var player: IJKFFMoviePlayerController!
        override func viewDidLoad() {
            super.viewDidLoad()
    
            let options = IJKFFOptions.byDefault()
            let url = URL(string: "rtsp://170.93.143.139/rtplive/470011e600ef003a004ee33696235daa")
            guard let player = IJKFFMoviePlayerController(contentURL: url, with: options) else {
                print("Create RTSP Player failed")
                return
            }
    
            let autoresize = UIView.AutoresizingMask.flexibleWidth.rawValue |
                UIView.AutoresizingMask.flexibleHeight.rawValue
            player.view.autoresizingMask = UIView.AutoresizingMask(rawValue: autoresize)
    
            player.view.frame = self.view.bounds
            player.scalingMode = IJKMPMovieScalingMode.aspectFit
            player.shouldAutoplay = true
            self.view.autoresizesSubviews = true
            self.view.addSubview(player.view)
            self.player = player        
            self.player.prepareToPlay()
        }
    }
  • Khởi tạo (Initialization) trong Swift

    Khởi tạo (Initialization) trong Swift

    Việc khởi tạo trong bất cứ ngôn ngữ lập trình nào đều rất rất quan trọng, trong một project thì bạn sẽ liên tục phải thực hiện khởi tạo các instance của các struct, class hoặc enum. Việc hiểu rõ và sử dụng thành thạo quá trình khởi tạo trong swift sẽ giúp bạn tăng performance cũng như chất lượng của source code, dưới đây sẽ là bài viết đào sâu hơn vào quá trình khởi tạo trong swift nhé.

    I. Khởi tạo trong Structure

    1. Khởi tạo mặc định

    Việc khởi tạo này đơn gỉản và giống với việc tạo 1 instance của method không có parameter nào, ví dụ

    let phoneX = Phone()
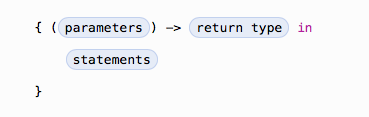
    Syntax

    init() {
       // New Instance sẽ được khởi tạo ở đây
    }

    Example

    struct Rectangle {
        var length: Double
        var breadth: Double
        init() {
            length = 12.0
            breadth = 5.0
        }
    }
    
    var rec = Rectangle()
    print("area of rectangle is \(rec.length * rec.breadth)")

    Ở đoạn code bên trên 1 instance là rec được khởi tạo với các thuộc tính là chiều rộng và chiều dài lần lượt là length = 12, và breadth = 5, sau khi chạy đoạn code trên sẽ thu được kết quả:

    area of rectangle is 60.0

    Chuyện gì sẽ xảy ra nếu xoá phần init() trong đoạn code trên:

    struct Rectangle {
        var length: Double
        var breadth: Double
    }
    
    var rec = Rectangle()
    print("area of rectangle is \(rec.length * rec.breadth)")

    Khi chạy đoạn code trên sẽ có thông báo lỗi là

    error: missing argument for parameter 'length' in call
    let rec = Rectangle()

    Ở đây thì trình biên dịch đang thông báo 1 error và bắt chúng ta phải khởi tạo với đối số của length, taị sao lại như vậy???
    Bởi vì bạn đang cố khởi tạo cho struct Rectangle mà các stored property chưa được gán giá trị mặc định
    Đoạn code sửa lỗi này được sửa như sau:

    struct Rectangle {
        var length: Double = 12.0
        var breadth: Double = 5.0
    }
    
    var rec = Rectangle()
    print("area of rectangle is \(rec.length * rec.breadth)")

    Chúng ta gán giá trị mặc định cho tất cả các stored property, ở đây thì chúng ta đã tạo ra instance rec với các stored property được gán giá trị ban đầu lần lượt là 12.0 và 5.0,
    vậy là vấn đề được giải quyết.

    Như trên thì chúng ta đã được tiếp cận với việc khởi tạo 1 struct với kiểu mặc định, nhìn lại 2 cách viết ở trên nhé:

    // 1
    struct Rectangle {
        var length: Double
        var breadth: Double
        init() {
            length = 12.0
            breadth = 5.0
        }
    }
    
    // 2
    struct Rectangle {
        var length: Double = 12.0
        var breadth: Double = 5.0
    }

    2 cách viết nói trên đều đưa đến 1 kết quả như nhau là đều tạo ra 1 instance có các giá trị khởi tạo mặc định là 12.0 và 5.0,
    tuy nhiên thì cách viết thứ 2 sẽ giảm bớt line code và tường minh hơn, vì vậy trong trường hợp cần khởi tạo với giá trị mặc định thì chúng ta nên chọn cách viết thứ 2 nhé.

    2. Khởi tạo với các Parameter

    Khi cần khởi tạo 1 instance với các giá trị của property được truyền vào như dưới đây:

    struct Rectangle {
        var length: Double
        var breadth: Double
    
        init(length: Double, breadth: Double) {
            self.length = length
            self.breadth = breadth
        }
    }
    
    let rect = Rectangle(length: 6, breadth: 12)
    print(" length is: \(rect.length)\n breadth is: \(rect.breadth) ")

    Kết quả sau khi chạy:

    length is: 6.0
    breadth is: 12.0

    Giờ bạn thử xoá phần init trong đọan code trên xem có gì xảy ra nhé.

    struct Rectangle {
        var length: Double
        var breadth: Double
    }
    
    let rect = Rectangle(length: 6, breadth: 12)
    print(" length is: \(rect.length)\n breadth is: \(rect.breadth) ")

    Oh, Code trên vẫn chạy bình thường. Do với struct thì Swift mặc định đã tạo sẵn cho bạn 1 hàm khởi tạo rồi, tuy nhiên nếu sử dụng hàm khởi tạo mặc định này thì chúng ta sẽ gặp không ít phiền phức như:

    • Khi đổi thứ tự các stored property thì khi gọi hàm khởi tạo mặc định thứ tự của Parameter cũng phải đổi tương ứng
    struct Rectangle {
        var breadth: Double
        var length: Double
    }

    Khi gọi phải đảo lại parameter:

    let rect = Rectangle(breadth: 6, length: 12)
    • Khi thêm init với name các parameter khác với mặc định trong struct:
    struct Rectangle {
        var length: Double
        var breadth: Double
    
        init(length: Double) {
            self.length = length
            self.breadth = 5.0
        }
    }
    
    let rect = Rectangle(length: 6, breadth: 12) // Lỗi
    print(" length is: \(rect.length)\n breadth is: \(rect.breadth) ")

    Đoạn code trên sẽ lỗi vì chúng ta đã viết 1 hàm init với parameter là length ở trong struct, việc này sẽ khiến cho swift không tự động viết hàm khởi tạo cho bạn nữa.
    Vậy làm thế nào để vừa có hàm khởi tạo tự viết và cả hàm khởi tạo tự động mà swift sẽ tạo cho chúng ta, đơn giản chỉ cần chuyển hàm init của chúng ta qua extension:

    struct Rectangle {
       var length: Double
       var breadth: Double
    }
    extension Rectangle {
       init(length: Double) {
           self.length = length
           self.breadth = length + 5.0
       }
    }

    Okey, vấn đề được giải quyết.

    3. Khởi tạo với các Parameter mặc định

    Đôi khi trong các hàm khởi tạo, bạn muốn gán giá trị mặc định cho các tham số như dưới đây:

    struct Rectangle {
        var length: Double
        var breadth: Double
    
        init(length: Double = 12.0, breadth: Double = 5.0) {
            self.length = length
            self.breadth = breadth
        }
    }
    
    let rectA = Rectangle()
    print(" rectA:\n length is: \(rectA.length)\n breadth is: \(rectA.breadth) ")
    
    let rectB = Rectangle(length: 50)
    print(" rectB:\n length is: \(rectB.length)\n breadth is: \(rectB.breadth) ")
    
    let rectC = Rectangle(length: 20, breadth: 6)
    print(" rectB:\n length is: \(rectC.length)\n breadth is: \(rectC.breadth) ")

    Kết quả là:

    rectA:
    length is: 12.0
    breadth is: 5.0
    rectB:
    length is: 50.0
    breadth is: 5.0
    rectB:
    length is: 20.0
    breadth is: 6.0

    Việc khởi tạo với các parameter mặc định khiến cho việc gọi hàm được đa dạng hơn, với tuỳ trường hợp thì sẽ có hay không có parameter.

    4. Initializer Delegation

    Initializer Delegation thực chất chính là việc gọi hàm khởi tạo từ các hàm khởi tạo khác, như ví dụ dưới đây:

    struct Rectangle {
        var length: Double
        var breadth: Double
    
        // 1
        init(length: Double, breadth: Double) {
            self.length = length
            self.breadth = breadth
        }
    
        // 2
        init(length: Double) {
            let breadth = length + 2.0
            self.init(length: length, breadth: breadth)
        }
    
    }
    
    let rect = Rectangle(length: 50)
    print(" rect:\n length is: \(rect.length)\n breadth is: \(rect.breadth) ")

    Kết quả là:

    rect:
    length is: 50.0
    breadth is: 52.0

    Ở đoạn code trên thì chúng ta có tới 2 hàm init trong struct, ở hàm init thứ 2 thì chúng ta thực hiện tính toán bề rộng trước khi gọi đến hàm init 1.
    Đây chính là Initializer Delegation nhé, viết ra 1, 2 lần là quen tay ngay.

    Điều gì sẽ xảy ra khi chúng ta gọi self trước khi call hàm init số 1, sửa đoạn code như sau:

    struct Rectangle {
        var length: Double
        var breadth: Double
    
        // 1
        init(length: Double, breadth: Double) {
            self.length = length
            self.breadth = breadth
        }
    
        // 2
        init(length: Double) {
            self.length = 5.0 // Báo lỗi: 'self' used before 'self.init' call or assignment to 'self'
    
            let breadth = length + 2.0
            self.init(length: length, breadth: breadth)
        }
    
    }
    
    let rect = Rectangle(length: 50)
    print(" rect:\n length is: \(rect.length)\n breadth is: \(rect.breadth) ")

    Lúc này thì compiler báo lỗi: ‘self’ used before ‘self.init’ call or assignment to ‘self’
    Lỗi này thông báo rằng chúng ta không được dùng self trước khi gọi Initializer Delegation. Việc này đảm bảo code sẽ không bị thay đổi không mong muốn. Giả sử như đoạn code trên pass qua compiler thì lúc này length = 50.0 chứ không phải bằng 5.0 như mong muốn.

    Chú ý trong phần I:

    - Khi khởi tạo 1 instance, chúng ta cần gán giá trị ban đầu cho tất cả các non-optional stored property.
    - Không gọi self trước khi call Initializer Delegation

    II. Khởi tạo trong Class

    Ở phần trên giới thiệu việc khởi tạo cũng như các vấn đề thường gặp khi khởi tạo 1 stucture. Đối với class thì việc khởi tạo sẽ tương đối khác và biến hoá hơn, biến hoá dư nào thì các bạn đọc ở bên dưới nhé:

    1. Hai loại khởi tạo trong class

    Riêng với class thì khởi tạo chia thành 2 loại là designated initializers and convenience initializers

    1.1. Designated Initializer

    Được coi là việc khởi tạo chính của class, đây là cách khởi tạo thông thường nhất. Trong hàm khởi tạo chúng ta cần gán giá trị ban đầu cho tất cả các non-optional stored property.

    class Rectangle {
        var length: Double
        var breadth: Double
    
        // Designated Initializer
        init(length: Double, breadth: Double) {
            self.length = length
            self.breadth = breadth
        }
    }

    Khi class của bạn có stored property là non-opional thì Việc khởi tạo với kiểu Designated Initializer là bắt buộc.

    1.1. Convenience Initializers

    Được coi là hàm hỗ trợ việc khởi tạo của class, trong hàm khởi tạo này chúng ta sẽ gọi đến các hàm khởi tạo khác ( Khá giống với Initializer Delegation trong struct)

    class Rectangle {
        var length: Double
        var breadth: Double
    
        // Designated Initializer
        init(length: Double, breadth: Double) {
            self.length = length
            self.breadth = breadth
        }
    
        // Convenience Initializer
        convenience init(length: Double, area: Double) {
            let breadth = area / length
            self.init(length: length, breadth: breadth)
    
        }
    }
    
    let rect = Rectangle(length: 5, area: 20)
    print(" rect:\n length is: \(rect.length)\n breadth is: \(rect.breadth) ")

    Kết quả sau khi chạy

    rect:
    length is: 5.0
    breadth is: 4.0

    Nhìn vào ví dụ trên thì chúng ta cũng thấy được vai trò của hàm Convenience Initializer rồi, khi bạn cần xử lý abc-xyz ở trong hàm khởi tạo, để việc khởi tạo gọi là tiện lợi nhất đối với bài toán của bạn,
    thì hãy nghĩ ngay đến Convenience Initializer nhé.

    2. Khởi tạo với subclass

    Để hiểu rõ phần này chúng ta đến với phần ví dụ luôn nhé:

    class Rectangle {
        var length: Double
        var breadth: Double
    
        // Designated Initializer
        init(length: Double, breadth: Double) {
            self.length = length
            self.breadth = breadth
        }
    }
    
    class Square: Rectangle {
        var area: Double
    }

    Khi run đoạn code trên chúng ta sẽ nhận được lỗi là

    stored property 'area' without initial value prevents synthesized initializers
        var area: Double

    Như đã được phân tích ở phần I, khi khởi tạo 1 instance bất kỳ thì luôn phải đảm bảo các giá trị mặc định cho tất cả các stored property non-optional
    Ở đây do đã khởi tạo thêm biến area ở subclass là Square nên swift yêu cầu phải gán giá trị.

    Như dưới đây là 2 cách để pass qua compiler

    // option 1
    class Square: Rectangle {
        var color: String = "red"
    }
    
    // option 2
    class Square: Rectangle {
        var color: String
        init(length: Double, breadth: Double, color: String) {
            self.color = color
            super.init(length: length, breadth: breadth)
        }
    }

    Ở option 1, sẽ gán giá trị mặc định cho property color là “red”
    Ở option 2, thêm một hàm khởi tạo ở subclass Square để thực hiện Designated Initializer

    Vậy sẽ thế nào nếu chúng ta viết như sau:

    class Square: Rectangle {
        var color: String
        init(length: Double, breadth: Double, color: String) {
            self.color = color
            self.length = length
            self.breadth = breadth
        }
    }

    Lúc này ta nhận được error với nội dung:

    error: 'self' used in property access 'length' before 'super.init' call
            self.length = length

    Compiler đang báo chúng ta đang sử dụng self để truy cập vào property length trước khi gọi super.init.
    super ở đây chính là class cha Rectangle, việc sử dụng super.init là bắt buộc để gán giá trị cho lengt và breadth.

    Tóm lại thì việc khởi tạo của subclass cũng chung quy tắc là phải gán giá trị ban đầu cho tất cả các non-optional stored property, thứ tự thì sẽ là gán property ở subclass trước, sau đó là gọi super.init để gán cho các property ở lớp cha.

    3. Thừa kế hàm khởi tạo

    Ở subclass, nếu chúng ta muốn khởi tạo bằng cách gọi hàm khởi tạo của class cha thì bắt buộc subclass đó phải có giá trị mặc định của tất cả các non-optional stored property và subclass không có hàm init. Việc này khiến khá khó chịu, vì vậy để sử dụng hàm khởi tạo của class cha chúng ta có thể sử dụng thừa kế hàm khởi tạo như sau:

    class Square: Rectangle {
        var color: String
    
        init(length: Double, breadth: Double, color: String) {
            self.color = color
            super.init(length: length, breadth: breadth)
        }
    
        override init(length: Double, breadth: Double) {
            self.color = "red"
            super.init(length: length, breadth: breadth)
        }
    }

    Đơn giản chỉ cần override lại hàm init từ class cha là Rectangle, chúng ta có thể sài hàm khởi tạo của class cha một cách ngon lành rồi.

    III. Tổng kết

    Bài viết này mình đã giới thiệu về khởi tạo ở structure cũng như class, hy vọng sẽ giúp các bạn hiểu sâu hơn về khởi tạo trong swift.
    Phần sau mình sẽ giới thiệu về các cách khởi tạo của 1 custom class thuộc UI element nhé (ví dụ như UIView)
    Mong các bạn đón đọc.

  • Fresher Training—iOS Basic Day 2

    Fresher Training—iOS Basic Day 2

    Today topic:

    • App Life cycle
    • View Controller Life cycle
    • UIView

    Exerices:

    Exercise 01: App Life Cycle
    • Hãy phân tích những delegate sẽ được gọi trong những trường hợp sau:
      • Khi user quit app từ fast app switcher (multi task)
      • Khi app bị crash do source code
      • Khi app bị suspended
      • Khi user mở app khác (bằng cách tap vào notification của app khác hoặc open app khác từ app hiện tại)

    4 điểm

    Exercise 02: View Life Cycle

    • Hãy liệt kê những methods (delegate) được gọi khi
      • Push screen B từ screen A
      • Back lại screen A từ screen B
      • User tap button Home của iPhone để cho app xuống background rồi mở lại app.

    2 điểm

    Exercise 03: View

    • Hãy phân tích điểm khác nhau và giống nhau giữa frame và bounds. Nhất là trong trường hợp như ảnh.
      • Biết toạ độ của A(x: 10, y: 55)
      • Biết toạ độ của B(x: 60, y: 5)
      • Biết toạ độ của C(x: 110, y: 55)
      • Biết toạ độ của D(x: 60, y: 105)
      • AC vuông góc BD

    2 điểm

  • Fresher Training—iOS Swift Day 4

    Fresher Training—iOS Swift Day 4

    Today topic:

    • Encoding & Decoding Types
    • Asynchronous Closures & Memory Management
    • Value Types & Value Semantics
    • Protocol-Oriented Programming

    Tham khảo: https://nhathm.com/swift-closure-escaping-autoclosure-b6cc22729e7

    Exercises:

    Exercise 01: ENCODING & DECODING

    Make this source code Codeable

    struct Student {
        var name: String
        var age: Int
        var study: [StudyClass]
    }
    
    struct StudyClass {
        var className: String
        var classCode: String
    }

    Điểm: 1

    Exercise 02: ENCODING & DECODING

                Decoding this JSON

    [{

             “country”: {

                  “country_capital”: {

                      “capital_name”: “Ha Noi”,

                      “population”: 5000000

                  },

                  “country_name”: “Viet Nam”

             }

         },

         {

             “country”: {

                  “country_capital”: {

                      “capital_name”: “Tokyo”,

                      “population”: 4000000

                  },

                  “country_name”: “Japan”

             }

         }

    ]

    Điểm: 2

    Exercise 03: MEMORY MANAGEMENT

        What wrong with below code? Fix it

    class People {
        let name: String
        let email: String
        var bike: Bike?
        
        init(name: String, email: String) {
            self.name = name
            self.email = email
        }
        
        deinit {
            print("People deinit \(name)!")
        }
    }
    
    class Bike {
        let id: Int
        let type: String
        var owner: People?
        
        init(id: Int, type: String) {
            self.id = id
            self.type = type
        }
        
        deinit {
            print("Bike deinit \(type)!")
        }
    }
    
    var owner: People? = People(name: "NhatHM", email: "[email protected]")
    var bike: Bike? = Bike(id: 1, type: "Honda")
    
    owner?.bike = bike
    bike?.owner = owner
    
    owner = nil
    bike = nil

    Điểm: 2

    Exercise 04: PROTOCOL

    Making this source code runable

    var color = UIColor.aliceBlue
    color = UIColor.oceanBlue
    

    Điểm: 2

    Exercise 05: generics

    What is generics? Show me an example

    Điểm: 1

  • Fresher Training—iOS Swift Day 3

    Fresher Training—iOS Swift Day 3

    Today topic:

    • Access Control & Code Organization
    • Custom Operators, Subscripts & Keypaths
    • Pattern Matching
    • Error Handling

    Thao khảo: Swift—Advanced control flow

    Exercises:

    Exercise 01: SINGLETON
    • A singleton is a design pattern that restricts the instantiation of a class to one object.
    • Use access modifiers to create a singleton class Logger. This Logger should:
    • Provide shared, public, global access to the single Logger object.
    • Not be able to be instantiated by consuming code.
    • Have a method log() that will print a string to the console.

    Điểm: 2

    Exercise 02: STACK
    • Declare a generic type Stack. A stack is a LIFO (last-in-first-out) data structure that supports the following operations:
    • peek: returns the top element on the stack without removing it. Returns nil if the stack is empty.
    • push: adds an element on top of the stack.
    • pop: returns and removes the top element on the stack. Returns nil if the stack is empty.
    • count: returns the size of the stack.
    • Ensure that these operations are the only exposed interface. In other words, additional properties or methods needed to implement the type should not be visible.

    Điểm: 2.5

    Exercise 03: SUBSCRIPT
    extension Array {
        subscript(index: Int) -> (String, String)? {
            guard let value = self[index] as? Int else {
                return nil
            }
            
            switch (value >= 0, abs(value) % 2) {
            case (true, 0):
                return ("positive", "even")
            case (true, 1):
                return ("positive", "odd")
            case (false, 0):
                return ("negative", "even")
            case (false, 1):
                return ("negative", "odd")
            default:
                return nil
            }
        }
    }

    What wrong with this code? How to fix?

    Điểm: 1.5

    Exercise 04: ERROR HANDLING

    Write a throwing function that converts a String to an even number, rounding down if necessary.

    Điểm: 2

  • Swift—Advanced control flow

    Swift—Advanced control flow

    Bài viết này giới thiếu cái khái niệm và các dùng về control flow trong Swift:

    For loop

    Countable ranges

    • countable closed range: 0…5
    • countable half-open range: let halfOpenRange = 0..<5

    For in với where condition

    • Swift hỗ trợ for in where để lọc ra các điều kiện phù hợp trong tập cho trước:
    var sum = 0
    
    for i in 1...10 where i % 2 == 1 {
        sum += i
    }

    Continue and labeled statements

    • Trong nhiều trường hợp, khi điều kiện trong vòng loops trở nên phức tạp hơn, thì ta có thể sử dụng “labeled statements” để tiếp tục vòng loop tương ứng, ví dụ như dưới:
    var sum = 0
    rowLoop: for row in 0..<8 {
        columnLoop: for column in 0..<8 {
            if row == column {
                continue rowLoop
            }
            sum += row * column
            print(sum)
        }
    }
    • Ở đây, rowLoop và columnLoop được gọi là “labeled statements”, ta có thể tiếp tục vòng loop tương ứng bằng câu lệnh “continue”

    Switch statements

    • Không như Objective C là switch điều kiện switch (expression) chỉ có thể sử dụng các loại data dạng như int, character…, thì trong Swift, điều kiện switch đã trở nên phong phú và thuận tiện hơn rất nhiều.
    • Các điều kiện switch mà Swift support:
      • Điều kiện switch là một hoặc nhiều giá trị cùng loại data với nhau
      • Điều kiện switch có thể là range
    • Các điểm chính của Switch Statement:
      • No implicit Fallthrough (không tự động chuyển sang case tiếp theo): đối với các case điều kiện của Switch statement thì không có chuyện điều kiện switch được tự động chuyển sang case tiếp theo, nghĩa là mỗi điều kiện trong case của switch đều phải có body. Đoạn code như dưới sẽ báo lỗi khi compile. (Trong trường hợp muốn kết hợp nhiều điều kiện switch case thì sử dụng “compound case” switch.)
    switch age {
    case 19: // Error
    case 20:
        print("adult")
    default:
        print("default case")
    }
    • Interval matching: switch trong Swift hỗ trợ switch case theo từng khoảng giá trị. Ví dụ:
    let age = 18
    
    switch age {
    case 0..<18:
        print("child")
    case 18..<60:
        print("adult")
    default:
        print("old")
    }
    • Tuples: Swift switch statement hỗ trợ điều kiện trong switch case là tuple, cách sử dụng cũng rất linh hoạt. Ví dụ (lấy từ swift.org):
    let somePoint = (1, 1)
    switch somePoint {
    case (0, 0):
        print("\(somePoint) is at the origin")
    case (_, 0):
        print("\(somePoint) is on the x-axis")
    case (0, _):
        print("\(somePoint) is on the y-axis")
    case (-2...2, -2...2):
        print("\(somePoint) is inside the box")
    default:
        print("\(somePoint) is outside of the box")
    }
    • Đối với trường hợp sử dụng tuple thì điều kiện trong case có thể là mapping cả tuple, hoặc chỉ 1 giá trị trong tuple mà thôi, đối với giá trị không cần so sánh thì dùng ký tự “_” (wildcard pattern) để định nghĩa.
    • Value Bindings: trong trường hợp muốn lấy giá trị của giá trị trong tuple khi đã thoả mãn điều kiện thì dùng câu lệnh như sau:
    let anotherPoint = (2, 0)
    switch anotherPoint {
    case (let x, 0):
        print("on the x-axis with an x value of \(x)")
    case (0, let y):
        print("on the y-axis with a y value of \(y)")
    case let (x, y):
        print("somewhere else at (\(x), \(y))")
    }
    • -> như trong trường hợp này thì chỉ cần giá trị point thoả mãn y = 0 thì sẽ lấy được giá trị của x ra bằng câu lệnh “let x”
    • Where: where statement được dùng trong switch case để xử lý những câu switch với điều kiện phức tạp, ví dụ:
    let person = ("Gaby", "Female", 18)
    switch person {
    case (_, _, let age) where (age > 50):
        print("This person is not in age range")
    case (_, let gender, _) where (gender == "Male"):
        print("This is male employee")
    case (_, let gender, _) where (gender == "Female"):
        print("This is female employee")
    default:
        print("Default")
    }
    • Compound case: trong trường hợp nhiều điều kiện case xử lý chung một logic thì ta có thể kết hợp các điều kiện đó vào chung 1 case switch, ví dụ:
    let language = "Swift">switch language {
    case "Swift", "Objective-C":
        print("Company: Apple")
    case "Dart", "Go lang":
        print("Company: Google")
    default:
        print("Some other companies")
    }
    • Switch statement cho phép sau khi xử lý logic ở case trên, sẽ tiếp tục xử lý logic ở case dưới với keyword “fallthrough”

    Control Transfer Statements

    • continue:
      • Câu lệnh continue hỗ trợ việc break ra khỏi vòng lặp hiện tại của for-loop mà không break hoàn toàn khỏi for-loop
    • break
      • Câu lệnh break trong loop statement sẽ ngắt hoàn toàn vòng lặp.
      • Câu lệnh break trong switch statement sẽ kết thúc switch statement. Bởi vì các case của switch statement không được phép empty nên thường add break vào để tránh compile error. Ví dụ add break vào default case.
    • fallthrough
      • Fallthrough cho phép switch statement sau khi thực hiện xong logic của case bất kỳ, sẽ được chuyển tiếp xuống dưới để thực hiện case tiếp theo. Thường ứng dụng trong trường hợp muốn append thêm logic vào kết quả đã được xử lý ở các case của switch statement (sẽ viết ở default case)
    • return
    • throw
      • https://docs.swift.org/swift-book/LanguageGuide/ErrorHandling.html#ID510
  • Fresher Training—iOS Swift Day 2

    Fresher Training—iOS Swift Day 2

    Today topic:

    • Properties
    • Methods
    • Advanced Classes Enumerations
    • Protocols
    • Generics

    Exercises:

    Exercise 01: PROPERTY
    1. Show me an example about a struct have property is another struct
    2. What is type property, example by source code

    1 and 1 point

    Exercise 02: Methods
    1. Define struct Coordinate with property have latitude and longitude. Write a method to get/set for this property
    2. (Optional) Compare between class’s method and struct’s method

    1 and 0.5 point

    Exercise 03: Advanced class

    What is deinit of class?

    Create three simple classes called A, B, and C where C inherits from B and B inherits from A.

    Write init method that print class name before and after call super.init

    Write deinit method then printed simple log like: Destroy A / B / C

    Now, look at below codes

    do {
        let _ = C()
    }

    These codes will create an instace of C then release. Please explain printed log

    2 point

    Exercise 04: Protocols

    Define a protocol Vehical, this protocol will have some properties like fuel, speed, and some method like run()…

    Implement at least 3 class conform to this protocol and show me difference kind of run()

    What do you think about inheritance and protocol for this case?

    2.5 point

  • Fresher Training—iOS Swift Day 1

    Fresher Training—iOS Swift Day 1

    Today topic:

    • Expressions, Variables & Constants
    • Types & Operations
    • Control Flow
    • Functions
    • Optionals
    • Arrays, Dictionaries & Sets
    • Collection Iteration with Closures
    • Strings
    • Structures
    • Classes

    Exerices:

    Exercise 01: Expressions, Variables & Constants

    Declare four constants named x1, y1, x2 and y2 of type Double. These constants represent the 2-dimensional coordinates of two points. Calculate the distance between these two points and store the result in a constant named distance.

    1 point

    Exercise 02: Expressions, Variables & Constants

    Given a number n, calculate the factorial of n.  (Example: 4 factorial is equal to 1 * 2 * 3 * 4.)

    1 point

    Exercise 03: Control Flow
    1. Print 0.0, 0.1, 0.2, 0.3, 0.4, 0.5, 0.6, 0.7, 0.8, 0.9, 1.0. Don’t use stride(from:by:to:)
    2. What is Labeled statements? Using source code to explain.

    1 point and 1.5 point

    Exercise 03: Control Flow
    1. Write a function that print log. This function can take a string as parameter, or multiple strings as paramsters. Return false if any string is empty.
    2. (Optional) Write a function that calculate fibonancy sequence:  func fibonacci(_ number: Int) -> Int

    1 point and bonus 0.5 point

    Exercise 04: Collection Iteration with Closures

    Define a dictionary with key is name: String and value is score: Double
    Calculate sum of all score in dictionary

    1 point

    Exercise 05: Struct vs Class

    Compare between struct and class

    1.5 point

  • Swift—Closure

    Swift—Closure

    Khi mới làm quen với Swift, đôi khi ta gặp phải những đoạn code như dưới:

    Client Side Swift — iOS
    Server Side Swift — Vapor

    Tuy nhiên ta không hiểu chúng là gì, và dùng như nào. Trong Swift, những đoạn code kiểu như trên được gọi là Closure, bài Note này sẽ đi sâu vào bới móc xem Closure là gì ;))

    Trong Swift thì Closure là khái niệm khá quan trọng, ứng dụng nhiều cũng như là khó đọc cho người mới nếu chưa nắm được syntax của nó. Bài viết này sẽ nói về khái niệm Closure cũng như một vài ứng dụng của nó.

    Closure là?

    Closure là một block code, có thể tách ra để tái sử dụng. Hiểu đơn giản hơn thì Closure là function, nhưng khuyết danh. Ta có thể gán Closure vào biến và sử dụng như các kiểu value khác.

    Closures có thể là 1 trong 3 loại sau:

    • Global functions: là closures có tên và không “capture” các giá trị.
    • Nested functions: là closures có tên và có thể “capture” các giá trị từ function chứa nó.
    • Closure expressions: là closures không có tên được viết dưới dạng giản lược syntax và có thể “capture” các giá trị từ các bối cảnh xung quanh.

    Capturing value:
    https://developer.apple.com/library/content/documentation/Swift/Conceptual/Swift_Programming_Language/Closures.html#//apple_ref/doc/uid/TP40014097-CH11-ID103

    2 loại đầu được gọi với cái tên khác là function. Và khi nhắc đến Closures, thường ta chỉ quan tâm đến trường hợp thứ 3, Closure expressions (từ giờ chỉ gọi tắt là Closure).

    Closure Syntax

    Ví dụ cụ thể về khai báo Closure:

    import Foundation
    // Declare a variable to hold a closure
    var add: (Int, Int) -> Int
    // Assign a closure to a variable
    add = { (a: Int, b: Int) -> Int in
    return a + b
    }
    // Or combine like this
    var sub = { (a: Int, b: Int) -> Int in
    return a – b
    }
    add(1, 2)
    sub(1, 2)

    Note: parameters trong Closure có thể là kiểu “in-out”, variadic, tuples, nhưng không thể có default value.

    So với Function thì Closure đã được viết ra với mục đích ngắn gọn nhất có thể, và nó như sau:

    // Declare a variable to hold a closure
    var add: (Int, Int) -> Int
    /** SHORTHAND SYNTAX **/
    // Not need return keyword when only have single return statement
    add = {(a: Int, b: Int) -> Int in
    a + b
    }
    add(1, 1)
    // Remove return type and parameters type
    // Because we already declare: var add: (Int, Int) -> Int
    add = {(a, b) in
    a + b
    }
    add(9, 2)
    // Remove parameters, Swift will refer parameters by number, start from 0:
    add = {
    $0 + $1
    }
    add(99, 1)

    Ứng dụng của Closure:

    Closure như là parameter cho function, Trailing closure syntax

    Với function thì ta hoàn toàn có thể truyền vào cho function khác dưới dạng arguments, tuy nhiên trước khi truyền thì phải define function sẽ dùng làm argument:

    Ví dụ dùng function làm parameter cho function

    Đối với Closure thì đơn giản hơn, ta có thể define closure inline:

    Ví dụ dùng closure làm parameter cho function
    Note: {$0 + $1}: Swift cho phép refer đến mỗi parameter bằng format như bên, bắt đầu từ index 0.

    Đối với những function có parameter cuối cùng là Closure, thì ta có thể viết lại function call dưới dạng Trailing Closure như sau:

    Trailing Closure example

    Cách làm này phù hợp với những Closure dài, dùng như complete block/callback…Ví dụ về cách sử dụng callback/block khi request data từ server, ví dụ:

    Objective C:

    Khai báo method:

    Gọi hàm:

    Swift Closure:

    Khai báo func:

    Gọi hàm:

    Các ứng dụng của Closure nên biết:

    sorted(): dùng để thay đổi điều kiện sort cho array/collection…

    filter(): dùng dể lọc các phần tử của collection/array với điều kiện nhất định, ví dụ như lọc tuổi người dùng để kiểm tra nhưng ai đủ tuổi xem 18+ chẳng hạn

    map(): dùng để áp dụng điều kiện nào đó cho tất cả các item trong array/collection, ví dụ tính tiền của sản phẩm sau khi áp dụng thuế tiêu thụ chẳng hạn

    reduce(): dùng để tính tổng của array…Xem ví dụ bên dưới, bài toán là cần tính tổng tất cả các sách có trong kho, mỗi record sách được lưu dưới dạng: tên sách, số lượng, và giá.

    reduce() có 2 parameters là giá trị ban đầu, tức là giá trị kết quả giả định ban đầu, ở ví dụ này được set là 0, và 1 closure tính toán trả về giá trị cần tính, giá trị này tiếp theo sẽ được truyền vào closure dưới dạng first parameter ($0), và lặp lại cho đến hết array.

    Với ví dụ ở trên thì reduce() sẽ xử lý như sau

    Step1. $0 sẽ có giá trị là 0 (chính là giá trị của init result). $1 là object đầu tiên của array books. Closure này sẽ return kết quả là $0 (=0)+ (12 * 39.000) = 468.000. Kết quả này sẽ được gán cho $0 của step tiếp theo. Nếu truyền vào giá trị ban đầu là số khác, thì $0 cũng tương đương với giá trị của số đó. Ví dụ ở trên, nếu truyền vào là books.reduce(5)… thì closure sẽ return kết quả là $0 (=5)+ (12 * 39.000)

    Step2. $0 sẽ có giá trị là kết quả của step 1, và $1 là object ở index = 1 của array books. Kết quả return của Closure là $0 (=468.000) + (9 * 22.000). Step này sẽ được lặp lại cho đến hết array books. Về cơ bản, step 1 và 2 chỉ khác nhau ở chỗ, ở step 1, $0 chưa có giá trị, nên nó sẽ được chỉ định là giá trị của parameter thứ nhất của Closure reduce(), a hi hi hi.


    Closure được dùng rất nhiều trong source code Swift, nếu biết syntax thì sẽ dễ hơn trong việc đọc source code, nắm được các ưu điểm và ứng dụng đúng lúc sẽ đem lại source code ngắn gọn và hiệu quả hơn…

    Note: Một vài gist về function và closure.

  • Swift —Giới thiệu sơ lược

    Swift —Giới thiệu sơ lược

    Swift là gì?
    Swift là ngôn ngữ lập trình được phát triển bởi Apple, do Chris Lattner làm trưởng nhóm thiết kế. Lần đầu tiên được giới thiệu công khai là vào WWDC năm 2014 của Apple. Năm 2015, Swift chính thức trở thành open source và từ đó luôn phát triển mạnh mẽ với những đóng góp không ngừng từ cộng đồng lập trình viên quốc tế.


    Điểm mạnh của Swift
    Swift là ngôn ngữ lập trình mạnh mẽ và trực quan, dùng để viết ứng dụng cho macOS, iOS, watchOS, tvOS, Linux (và một vài OS khác). Do được truyền cảm hứng từ các ngôn ngữ khác như Objective-C, Haskell, Ruby, Python, C#… nên Swif mang hơi hướng hiện đại và luôn có những tính năng mới mẻ. Swift cũng rất dễ dàng để làm quen vì syntax đơn giản, ngắn gọn.  Swift được thiết kế với tiêu chí là sẽ trở thành ngôn ngữ mạnh mẽ và an toàn, cùng với đó là tốc độ xử lý cũng như hiệu suất cao, đảm bảo rằng Swift sẽ còn phát triển và còn mạnh mẽ hơn trong tương lai.

    Swift là ngôn ngữ cân bằng giữa performance và productivity https://developer.apple.com/videos/play/wwdc2014/102/

    Swift có thể làm được gì?
    Swift là ngôn ngữ chính để phát triển ứng dụng chạy trên các OS của Apple như macOS, iOS, tvOS, watchOS. Ngoài ra Swift còn được dùng để phát triển các ứng dụng server/web chạy trên các nền tảng Linux OS, hiện tại có các Web Framework nổi tiếng có thể kể tên như Vapor, Perfect, Kitura (phát triển bởi IBM). Trong một vài bài test benchmarks thì Vapor và Perfect cũng có rất nhiều điểm nổi bật so với NodeJS. Điều này rất thuận lợi cho các lập trình viên iOS/macOS xây dựng các ứng dụng server-side cho bản thân họ.

    Hệ sinh thái Swift


    Làm thế nào để cài đặt và sử dụng Swift?
    Đối với những người dùng macOS thì cách nhanh nhất để install Swift là tải và cài đặt XCode, Swift sẽ được cài đặt cùng với XCode. Nếu không muốn download cả bộ cài XCode thì có thể cài đặt riêng thông qua toolchain tại đây https://swift.org/download/, sau khi cài đặt toolchain thì có thể sử dụng Swift bình thường.
    Đối với người dùng Ubuntu thì chỉ có phương pháp cài đặt thông qua toolchain, tham khảo chi tiết tại https://swift.org/download/
    Sau khi cài đặt xong thì gõ command swift -version để kiểm tra xem cài đặt thành công hay chưa.


    What’s next?

    Swift vẫn đang được phát triển bởi cộng đồng lập trình viên trên toàn thế giới, ngoài ra Swift còn được các công ty lớn như Apple, IBM hỗ trợ nên chắc chắn rằng Swift còn rất nhiều điều hấp dẫn đang chờ đợi. Nếu như bạn đã cài đặt XCode/Swift thành công thì hãy bắt tay vào việc viết một ứng dụng đi thôi.